This page is to further illustrate the lighting scenarios mentioned in my book “EXPOSED: Redefining Boudoir”
NATURAL LIGHT
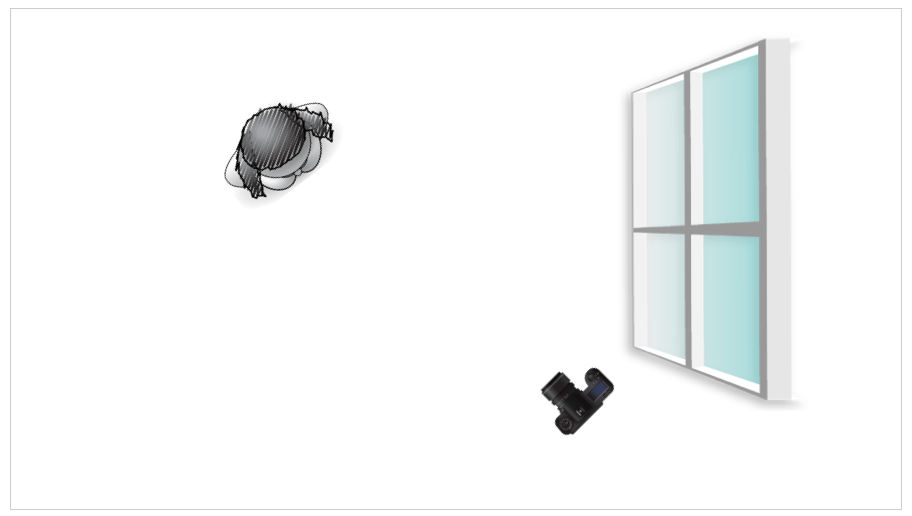
Scenario 1 – Easy & Flattering Natural Light Set-up
Here’s how to do it
Model is about 6 to 8 feet from the window, so it’s not too harsh or contrasty. However depending on the light quality that day (and the weather!) you may need to move the model closer to the window. For the most flattering and easy lighting set-up, angle your model slightly towards the window (or slightly behind the window for some nice edge light). Position yourself adjacent to the window. This is my favorite look. You can try collapsible reflectors to bounce or reflect the light from the window back into shadow areas of the subject. I mostly prefer not using the reflector, because I love shadow!
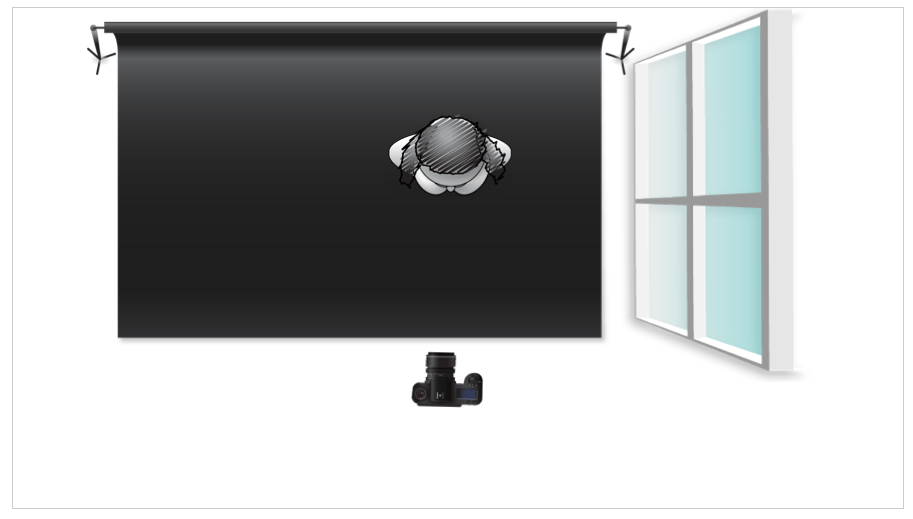
Scenario 2 – Easy Natural Light Studio Set-up while On-Location
Here’s how to do it
Model is on a grey seamless paper backdrop or black muslin near a window – again, the distance she will need to be away from the window will depend on the quality of light that day (as well as time of day). This is a nice side-light that highlights curves! I love doing this easy set-up to help create variety while in a hotel room or other interior location. I’m often in tiny spaces, so sometimes this whole area is only a few feet by a few feet.
NATURAL & CONTINUOUS LIGHT
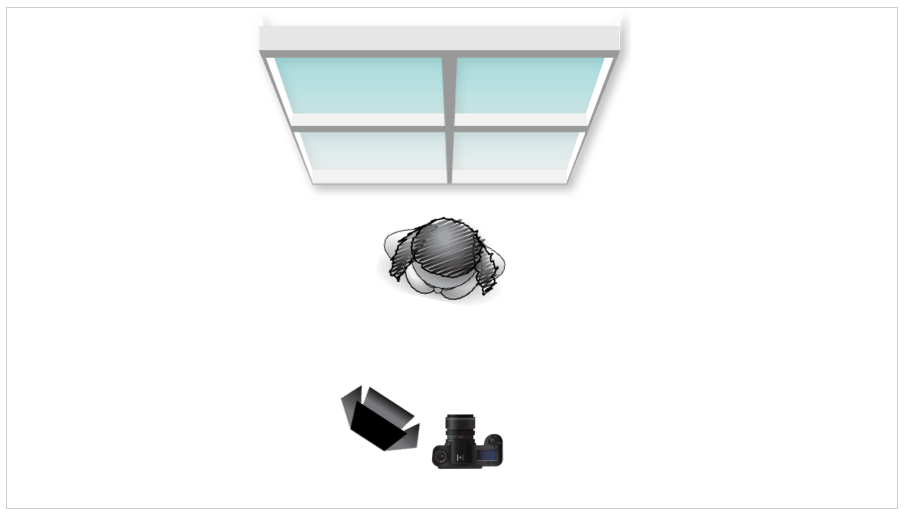
Scenario 3 – Backlit from Window with Continuous or Video Light
Here’s how to do it
This is another favorite look – totally easy and gorgeous. The backlight is natural light from a window, and if you overexpose a stop or two, you will be unable to see where the outline of your model’s body begins and ends, so I love using this one with plus-sized women since it’s very flattering. The continuous or hand-held video light is turned up just enough to give you a little boost in light from the front.
STUDIO STROBES
Scenario 4 – Studio Strobe, One Main Light on Grey Backdrop
Here’s how to do it
Ok, this is the easiest thing in the world, and I love all the variety you can create with just one main light using different placement. It’s important to note that you must use a grey backdrop and not black if you only want to use one light. Once you use black, you’ll have to add a second light as a hair light to separate your subject from the background. (Although honestly, I love the look of disappearing into the backdrop and do that often – see Scenario 5 below).
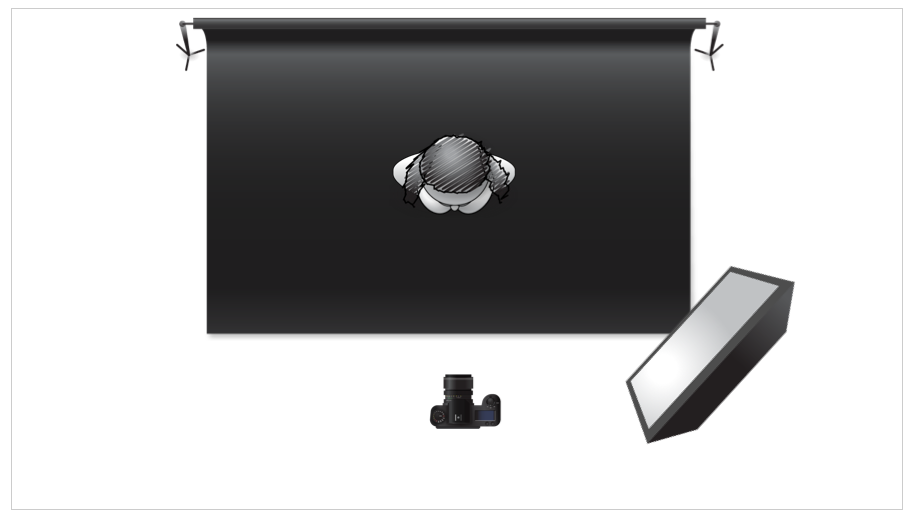
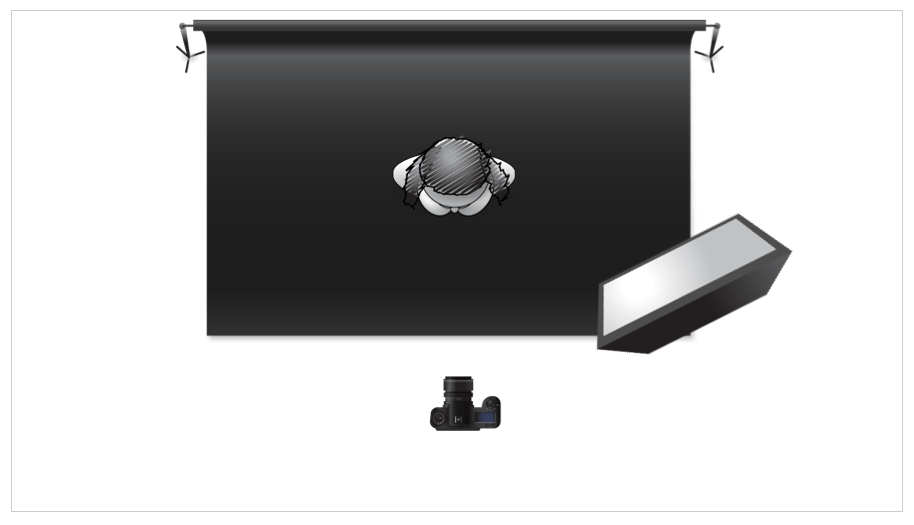
Scenario 5 – Studio Strobe, One Main Light “Feathering” on Black Backdrop
Here’s how to do it
Remember when I said just a second ago to use the grey backdrop so you see separation between backdrop and model? Well, forget that! I love the look of disappearing into the background and again, this is extremely flattering to plus-sized women since you can’t see where the body ends – it just disappears into luscious shadow 😉 Place the light with softbox slighty away from the subject so they are only lit by the edges, a technique called “feathering.”
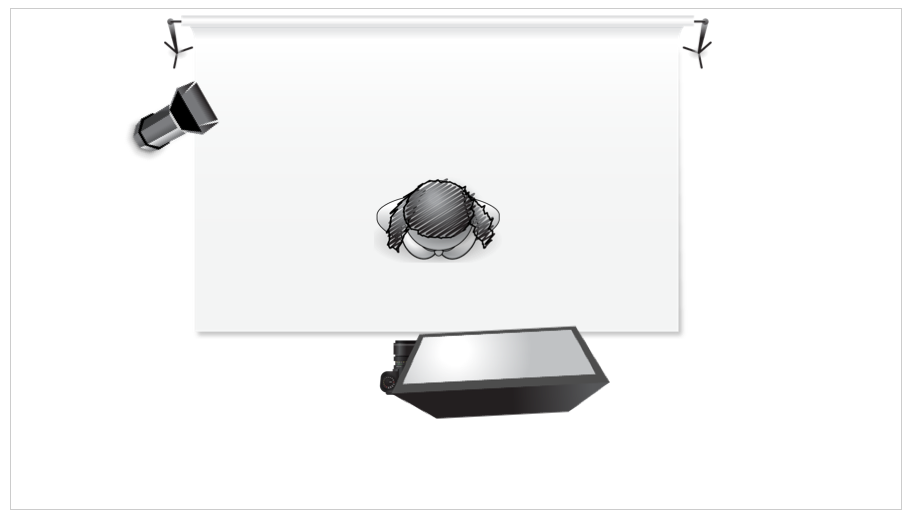
Scenario 6 – Studio Strobe, Main Light and Second Light on White Backdrop
Here’s how to do it
I honestly rarely use this set-up – for some reason I vastly prefer the look and depth created with the grey or black backdrops or an all white set of a studio location, but rarely do I do a high-key white set-up for women. I do however love this look for babies and kids – very commercial. If you love pin-up, this is a great lighting scenario for you. Main light is directly in front of your model and position yourself as close to that light as poassible without interfering and creating a shadow (I get all up in there and usually my camera is actually touching the softbox.) Make sure to light the background with a second light. The background should be about one stop lighter then the main light to ensure the background appears white and not grey. But if you make the second light too strong, it will wash out the edges of your subject, and not in a good way. Example: if your subject is at f/11, the background should be about f/8.

